


Lightning minikube without docker-Desktop
Before installing minikube make sure to have a chocolatey software package manager installed or pass the command in PowerShell.
- Go to Powershell with Admin access.
- Paste the command below and type > yes if prompted.
- Close and reopen the Powershell.
Set-ExecutionPolicy Bypass -Scope Process -Force; `
  iex ((New-Object System.Net.WebClient).DownloadString('https://chocolatey.org/install.ps1'))
This will make sure chocolatey is installed properly.
Installing Minikube with choco
choco install minikube -y
You must first construct an external network switch based on physical network adapters before you can start a Minikube cluster with hyper-v capability .The steps below must be followed:
Making minikube to connect with HyperV. In order to that Enable the HyperV features in windows
Enable-WindowsOptionalFeature -Online -FeatureName Microsoft-Hyper-V -All
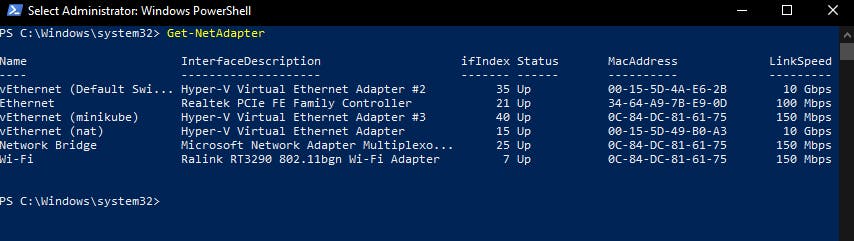
- Check physical Network Adapters (Ethernet or Wi-Fi)
- Create an external virtual switch
Get-NetAdapter
New-VMSwitch -Name "minikube" -AllowManagement $True -NetAdapterName “vEthernet or Wi-Fi”
This will create the New-VMswitch
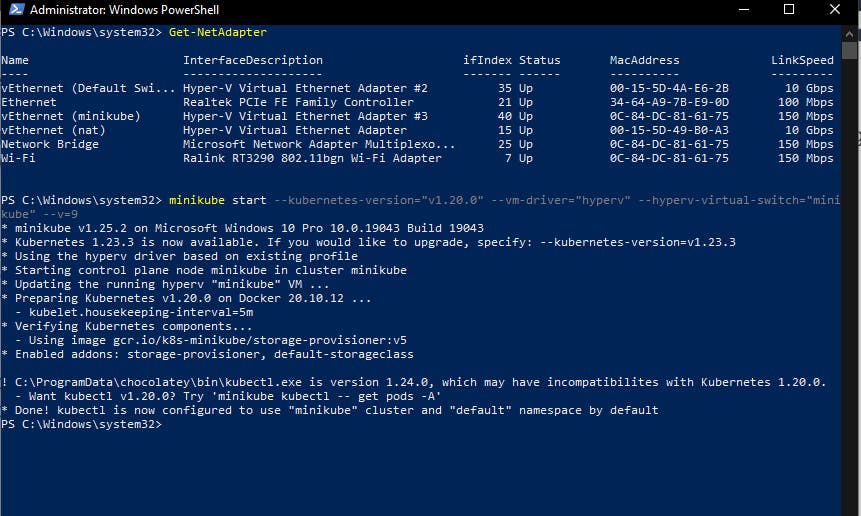
Finally start minikube Kubernetes cluster using the command
minikube start --kubernetes-version="v1.20.0" --vm-driver="hyperv" --hyperv-virtual-switch="minikube" --v=9
The above command will ensure to run Kubernetes cluster with version v1.20.0 having hyperv with virtual switch network as minikube
Use kubectl command to verify the cluster is up and running by passing command
kubectl get nodes

Finally, the cluster is up and ready to play.
The extra command for help In case of failure
For removing the external virtual switch
Remove-VMSwitch "minikube"
If you want to delete the created cluster
minikube delete --all
Switching between two or more cluster
kubectl config use-context <cluster name>